Open Starter Scene
The easiest way to make a new course is to use the models and prefabs we provide. Start by opening the scene "_WorldJam2/Scenes/Starter.unity"
Make your own Folder
It's important to save anything specific to your project in a folder outside of the "_WorldJam2" folder so you can import updates without overwriting your work. We recommend you create a new folder under Assets, we'll call it "_MyProject" for this demo. We use underscores at the beginning of important folders so they show up at the top of the alphabetically-sorted file listing.
Make New Course Asset
The ObstacleCourseAsset holds all the special information about your Checkpoints, Player Prefabs, Score Display, PowerUps and more.
- In the Project window, find the "StarterCourse.asset" under "_WorldJam2/Courses" and Duplicate it.
- Rename the new course to something custom like "MyCourse.asset" and move it to your "_MyProject" folder.
- In your hierarchy, select the CourseManager under "Udon/CourseManager".
- Drag and drop the new Course Asset your just created to the "Asset" field on the Obstacle Course Data script on the CourseManager object.

Now all your changes will be saved to your custom course instead of the Starter course.
Add Course Pieces
You can find all the available Course Pieces in the project under "Assets/_WorldJam2/Prefabs/Course Pieces".

- To add new pieces to your course, just drag and drop them into the scene view. You can hold CTRL while dragging to snap the items to a grid.
- If you're using Udon on any of your pieces, make sure to Unpack them from being prefabs to just regular GameObjects. It's also a good idea in case you want to load in an updated package for this project with overwriting your existing pieces.
Unity has many settings for aligning items to a grid - check out the manual here: Grid Snapping
Add Checkpoints
Your Start Gate, Checkpoints and Finish Gate are best added through the special Utilities window we made for this jam.
Open the Obstacle Jam Utilities Window from your menu bar under "⏵Obstacle Jam Utilities / Open Window"
Check out the prefabs:

These are the only three prefabs we need to make a working course - a start Gate, a Checkpoint and a FinishGate.
The utilities window makes it very easy to add new Checkpoints.Select a prefab from the "Checkpoint Prefabs" list and move your cursor over to your Scene View. You'll see a preview of the selected prefab, it will try to place itself intelligently on the surface you're pointing at - notice how the gate snaps to the side of the block in the GIF below until I point at the top.
Once you're happy with the placement, press the Spacebar to actually add the prefab and wire it up to your scene.
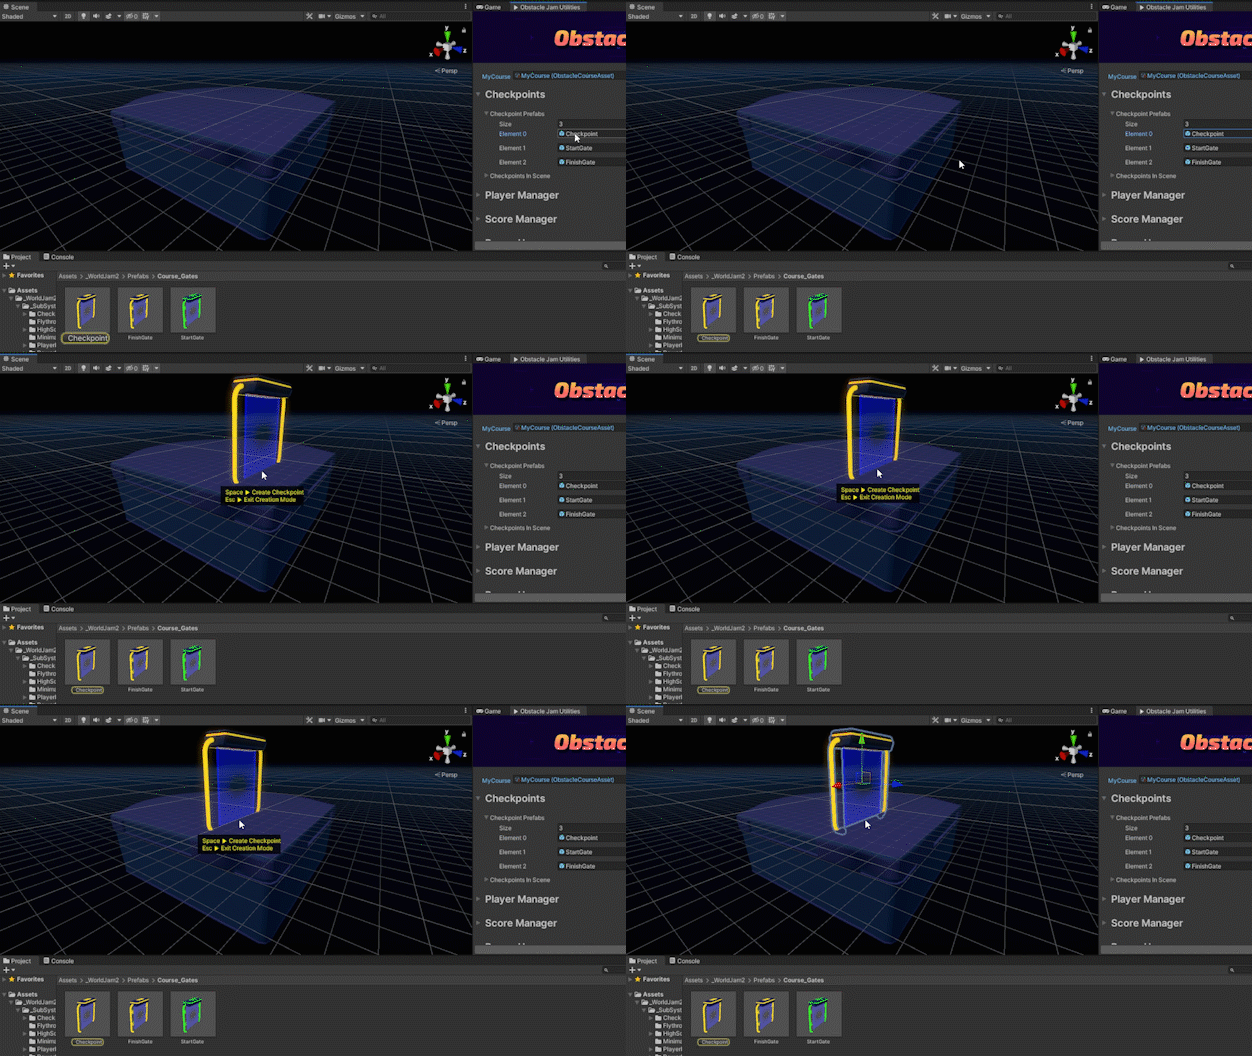
When you add a Checkpoint prefab this way, it is automatically added to your "Checkpoints In Scene" list. Open that list to see the new checkpoint included:
Select one of these checkpoints and the Scene View will move to focus on it. You can also see it selected in the hierarchy. If you press the triangle next to this new "Checkpoint 1" object in your hierarchy, you can see an UdonProgram on it. Select that UdonProgram and you can see that its 'index' has been automatically set to 1.
- Continue to add checkpoints around your course until you've got enough to get started. If you need to rearrange the order, you can use the up and down arrows in the "Checkpoints in Scene" list to change the order in which players should go through your gates. When you change the order this way, the Checkpoint's index is changed to match its actual order, and its name is changed to match its index.
Test Checkpoints
At this point, you've extended or changed the course, and added some checkpoints - time for a test! Open the VRChat SDK Control Panel, sign into your account, and choose "Build & Test" to test out your course!
If you have any problems launching your world or just want to learn more about local testing, check out the Build and Test docs.
Add PowerUps
Let's add some PowerUps to make things more interesting.
- In the Utility Window, open the "Power Ups" section. It's very similar to the Checkpoints section, with different parameters for the ones you've already placed.
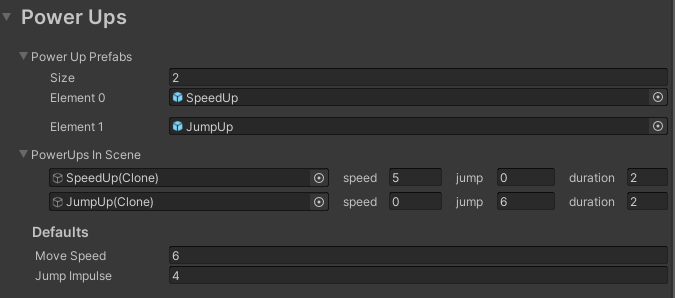
- Select one of the PowerUp Prefabs, then place it in your scene by pointing your mouse at a surface and pressing the spacebar, just like you did for Checkpoints.
- After placing a PowerUp, the Transform tool is selected so you can fine-tune the placement of your item.
- Your new PowerUp appears in the "PowerUps In Scene" section. You can use the fields to the right of the PowerUp's name to change the effect it has on your players. You can use negative numbers to reduce a player's Speed and Jump, but a negative duration will have no effect.
- Select a PowerUp to automatically focus on it in the Scene View and select it in the hierarchy. If you want to remove one, you can delete it from your scene and press 'Refresh' at the bottom of the Utility Window to update the listing.
You can also change the default Move Speed and Jump Impulse in this section. Make sure you DON'T put a VRCWorldSettings program in your world or else it will fight with these settings.
Move Speed sets Walk, Run and Strafe speeds to be all the same.
Test PowerUps
Build & Test your scene again to try out your new PowerUps!
Add Hazards
Find the Hazard prefabs in "Assets/_WorldJam2/Prefabs/Hazards"
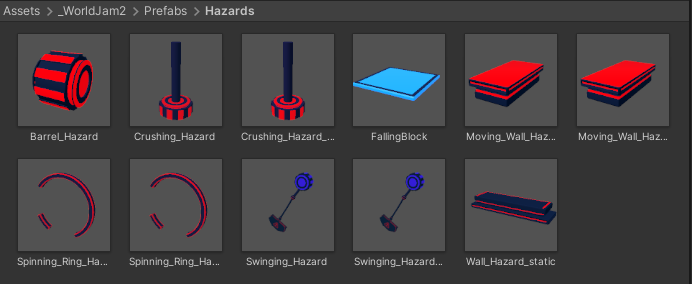
These don't use our special tools since they don't need any fancy setup. Just drag and drop them into your scene and fine-tune their placement.
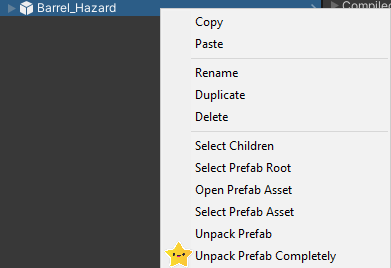
After you've placed a hazard, right-click the GameObject in your hierarchy and choose "Unpack Prefab Completely". This will ensure that any updates to your project won't overwrite Hazards you've already created, and avoid some known issues with Udon and Prefabs.
Once you've placed your Hazards, press the "Refresh" button at bottom of the Utility window. This will inject some references into your Hazards so they can properly Respawn your users when they touch the Hazard.
Modular Hazards
The hazards we've included are modular so you can easily modify their look and difficulty. Each moving hazard consists of a collider set to "Trigger" attached to an animated game object. You can add different meshes and trigger placement for a whole new hazard concept using different course pieces we've included or kit-bashing other asset packs.
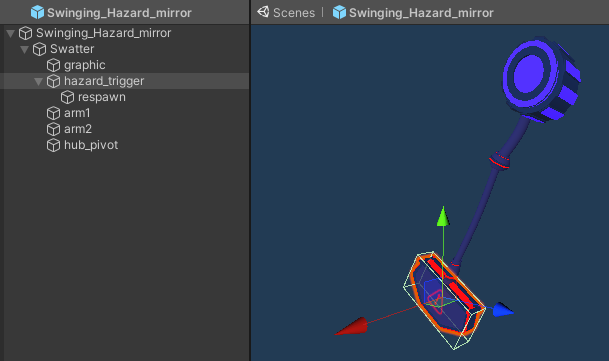
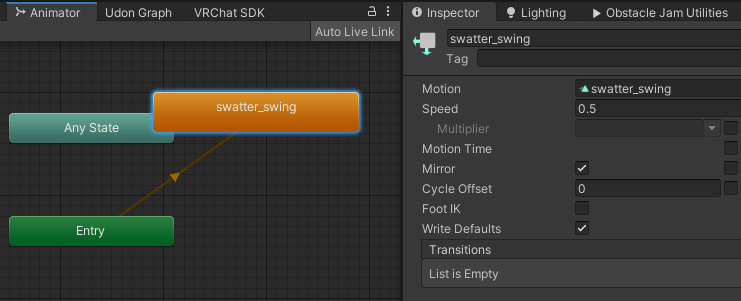
The four types of moving hazards included give you a starting point for horizontal, vertical, spinning and swinging hazards. You can change the speed of each type by using the Animator window.
Check Hazards
Time for another Build & Test!
Set Number of Players
It's a good idea to set the Number of Players in your Obstacle Course world to twice as high as the Player Capacity in your world. Just change the number in this field in your Utility Window, and the Object Pool which manages Player Objects will automatically fill with that number of players, and it will set all those players up with the variables they need.
Build & Publish
Once you're ready to invite your friends to help test your world, you can Build & Publish it to make it available in VRChat. You'll set your world name, take a picture to share, and you can Submit to Community Labs once you're ready for more people to see it!
You need to be spend some time in VRChat before you can publish worlds. Learn more here: FAQ
If you want to explore more options for Customizing your Obstacle Course, you can read on to Build From Custom Parts